How to set opals in gold: step-by-step artisan guide
Posted by AOD on 27th Mar 2026
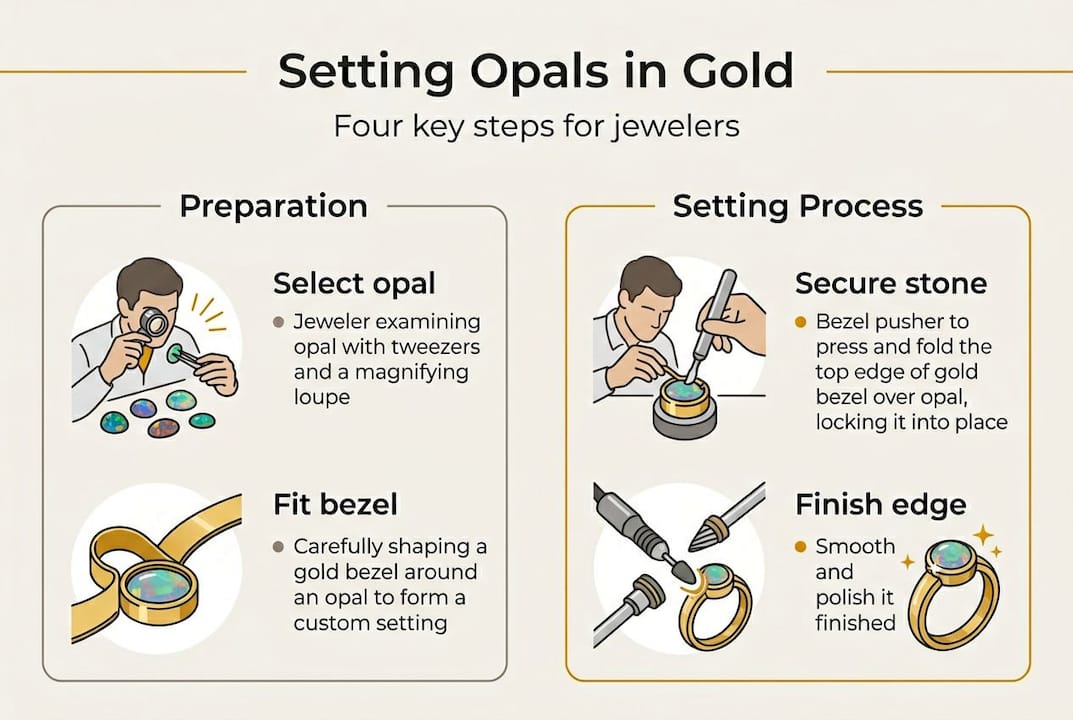
How to set opals in gold: step-by-step artisan guide
Setting an opal in gold is one of the most rewarding and demanding challenges a jewelry artisan can face. Unlike diamonds or sapphires, opals carry a living, shifting fire inside them, colors that dance and flicker with every turn of the wrist. Yet that same luminous beauty comes paired with real fragility. Opals rank between 5.5 and 6.5 on the Mohs scale, and their conchoidal fracture pattern means a single misplaced push can crack a stone worth hundreds of dollars. This guide walks you through every stage of the process, from understanding the gem’s vulnerabilities to executing a flawless bezel set in gold.
Table of Contents
- Understanding opals and why setting matters
- Essential tools and materials for setting opals in gold
- Preparing your opal and bezel for secure setting
- Step-by-step: Bezel setting opals in gold
- Alternative setting methods: When and how to use prongs
- Finishing, troubleshooting, and quality checks
- Take your opal setting skills further with Australian Opal Direct
- Frequently asked questions
Key Takeaways
| Point | Details |
|---|---|
| Bezel setting protects opals | This method reduces risk by evenly distributing pressure across the stone’s surface. |
| Choose soft gold alloys | 18k gold offers the flexibility needed for safe, gentle setting of opals. |
| Careful preparation is crucial | Prepping the stone and setting ensures a snug fit and minimizes potential damage. |
| Use prongs only with caution | Only attempt prong settings with robust opals and advanced techniques to avoid cracks. |
Understanding opals and why setting matters
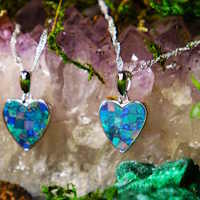
Before you pick up a pusher or a bezel cup, you need to understand what you are working with. An opal is not simply a colored stone. It is a hydrated silica structure, a lattice of microscopic spheres that diffracts light into that signature play-of-color. That internal architecture is breathtaking, and it is also the source of the gem’s weakness.
The Mohs hardness scale measures a mineral’s resistance to scratching. At 5.5 to 6.5, opal sits well below ruby (9), sapphire (9), and even quartz (7). In practical terms, this means everyday abrasion from countertops, keys, or even dust can scratch an exposed opal surface. Conchoidal fracture, the same curved break pattern seen in glass, means impact or uneven pressure can split the stone cleanly.
For the opal jewelry design process, these vulnerabilities shape every decision. The International Gem Society notes that opals are not suited for unprotected ring settings and recommends protective bezel or low-profile designs for daily wear. Prong settings, which concentrate force at isolated points, are particularly risky.
Key vulnerabilities to keep in mind:
- Sensitivity to impact: Even a moderate knock can cause internal fractures invisible to the naked eye.
- Sensitivity to heat: Rapid temperature changes can cause crazing, a network of fine surface cracks.
- Sensitivity to chemicals: Ultrasonic cleaners and harsh solvents can damage the stone’s surface or internal structure.
- Low abrasion resistance: Exposed edges and girdles wear down faster than harder gemstones.
“The opal’s fire is not a surface quality. It lives deep within the stone’s architecture, which is precisely why protecting that architecture during setting is non-negotiable.”
For deeper guidance on choosing the right stone before you begin, explore these opal selection tips to match the gem’s characteristics to your intended setting style.
Essential tools and materials for setting opals in gold
With an understanding of the gem’s fragility, gather the proper materials before beginning the process. Rushing to the bench without the right tools is one of the most common reasons opal settings fail.
The gold alloy you choose matters enormously. 18k gold is preferred for opal bezel settings because its relative softness allows you to apply controlled, gentle pressure without needing excessive force. Higher karat golds are too soft for structural integrity, while 14k and lower alloys require more force to move, increasing the risk of slipping and chipping the stone.
For a full comparison of metal choices, the guide on gold alloys for opal settings covers the trade-offs between yellow gold, white gold, and silver in detail.
Essential tools at a glance:
| Tool | Purpose | Notes |
|---|---|---|
| Brass pusher | Pushing bezel wall over stone | Softer than steel, reduces chip risk |
| Wood pusher | Gentle final pressure | Ideal for delicate finishing passes |
| Bezel rocker | Rocking motion across bezel edge | Distributes pressure evenly |
| Burnisher | Smoothing and polishing bezel edge | Use after stone is fully secured |
| Flex shaft or rotary tool | Trimming bezel height | Use with care, avoid heat buildup |
| Digital calipers | Measuring stone and bezel dimensions | Accuracy to 0.1mm is essential |
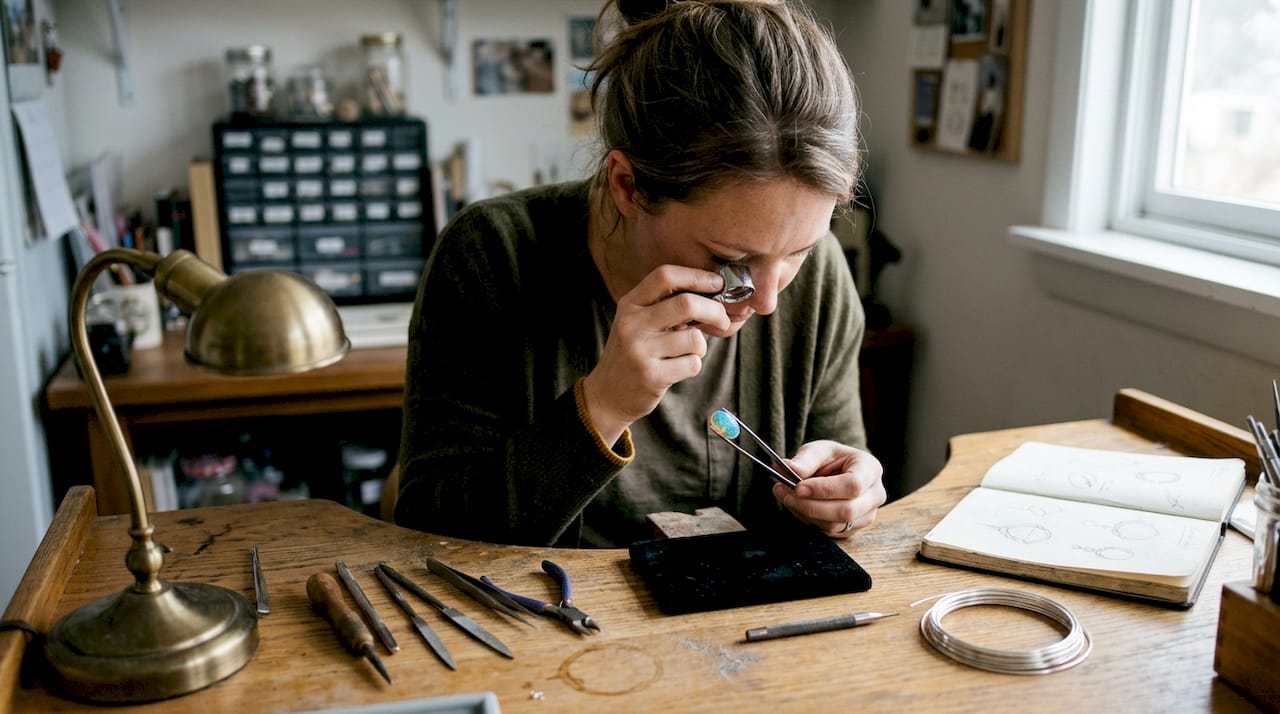
| Loupe (10x) | Inspecting fit and finish | Check for gaps and edge irregularities |
Additional materials you will need:
- Pre-made 18k gold bezel cups or strip bezel in the correct gauge
- Soldering equipment if fabricating a custom bezel from strip
- Jeweler’s wax or shellac stick for holding the piece during setting
- Polishing compounds appropriate for gold
- Lint-free cloth for final cleaning
For a broader look at the craft, the resource on crafting opal rings provides context on how tool selection influences the final result.
Preparing your opal and bezel for secure setting
Once you have the right tools and gold alloy, it is time to prepare your opal and bezel for a successful set. This stage is where precision pays off. A poorly fitted bezel or an uninspected stone can undo hours of careful work.
A well-prepared opal cabochon should have a 90-degree girdle at least 2mm high, with a slightly rounded base edge to prevent stress concentration when the bezel wall is pushed over. Inspect the girdle carefully under a loupe for any existing chips, cracks, or inclusions near the edge.
Follow these preparation steps in order:
- Measure the stone precisely. Use digital calipers to record length, width, and height at multiple points. Opals are rarely perfectly uniform.
- Size the bezel to match. The bezel interior should allow the stone to drop in with minimal lateral movement, no more than 0.1mm of play on each side.
- Check the bezel height. The wall should rise just above the stone’s girdle, enough to fold over cleanly without covering the crown.
- Test-fit the stone. Place the opal in the bezel without any adhesive. It should sit level, with no rocking or tilting.
- Adjust the bezel if needed. Use a bezel mandrel or fine file to correct any irregularities in the wall height or interior diameter.
- Clean both surfaces. Wipe the stone with a lint-free cloth and clean the bezel interior with a soft brush. No oils, fingerprints, or debris should remain.
Pro Tip: If the stone rocks slightly in the bezel, a thin layer of jeweler’s epoxy on the base can stabilize it before setting. Always disclose any adhesive use to your client.
For more on the design decisions that precede this stage, the guide on designing custom opal jewelry covers how setting style choices affect stone selection.
Step-by-step: Bezel setting opals in gold
With everything prepped, follow these steps to safely bezel-set your opal in gold. Patience and light, deliberate pressure are your greatest assets here.
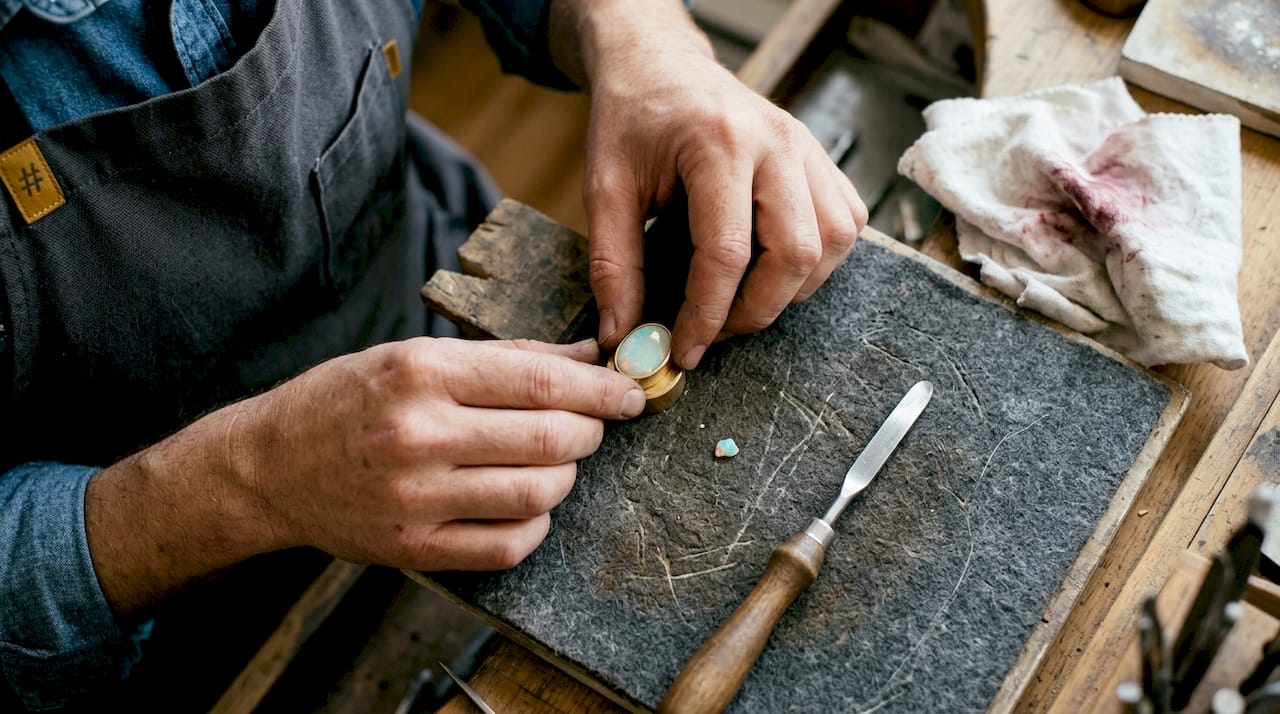
- Secure the piece in setting wax or a ring clamp. The work must be completely stable before you apply any pressure to the bezel.
- Place the opal in the bezel cup. Lower it gently, ensuring it sits flat and centered.
- Begin with a brass pusher at 12 o’clock. Apply light, downward pressure to start folding the bezel wall over the girdle.
- Move to 6 o’clock, then 9 o’clock, then 3 o’clock. This cross-pattern distributes pressure evenly and prevents the stone from shifting.
- Work around the bezel in small increments. Use a peeling motion with the pusher rather than a direct downward stab. This reduces the risk of the tool skidding onto the stone.
- Switch to a wood pusher for final passes. The softer material gives you tactile feedback and reduces the chance of marring the gold.
- Use a bezel rocker to smooth the wall. Rock gently back and forth along the entire circumference to eliminate any high or low spots.
- Burnish the edge to a clean finish. A polished bezel edge signals quality craftsmanship and protects the stone’s girdle from snagging.
Pro Tip: If the bezel wall is too thick to move easily, thin it carefully with a flex shaft before setting. Forcing a thick wall risks cracking the opal.
Bezel vs. prong setting comparison:
| Feature | Bezel setting | Prong setting |
|---|---|---|
| Pressure distribution | Even, around full circumference | Concentrated at individual points |
| Opal edge protection | High | Low to moderate |
| Visual exposure of stone | Partial (edge covered) | Maximum |
| Skill level required | Intermediate | Advanced |
| Risk of chipping | Low | High |
| Recommended for daily wear | Yes | With caution |
For workflow planning across a full commission, the custom opal jewelry workflow guide and the resource on opal ring sizing tips are both worth reviewing before client consultations.
Alternative setting methods: When and how to use prongs
While bezel settings are safest, there are times when prongs are an option if you proceed carefully. A client may request maximum visual exposure of the stone, or the opal’s size and robustness may make a prong setting viable.
Prong settings carry significant risk due to uneven pressure concentration. If you choose this path, the following design features are non-negotiable:
- Use six or more prongs. More contact points mean pressure is distributed more widely across the girdle.
- Keep prongs thin and tapered. Thick prongs require more force to bend and increase the chance of cracking.
- Ensure foundation support beneath the stone. A seat or gallery wire under the opal prevents it from flexing under pressure.
- Alternate your bending sequence. Never bend adjacent prongs consecutively. Work in an opposing pattern, similar to the cross-pattern used in bezel setting.
- Select only robust stones. The opal should have a girdle of at least 2mm and no visible inclusions or fractures near the edge.
Pro Tip: Practice prong setting on inexpensive glass cabochons of the same dimensions before working on a client’s opal. The muscle memory you build is worth more than any written instruction.
For design-specific guidance, the article on custom opal ring design explores how prong geometry affects both aesthetics and stone safety.
Finishing, troubleshooting, and quality checks
After setting, it is vital to check your work for both security and luxury finish. A stone that looks set but moves under light pressure is a liability waiting to become a complaint.
Run through this quality checklist before the piece leaves your bench:
- Tug test: Apply gentle lateral pressure to the stone with a wooden tool. There should be zero movement.
- Visual inspection under loupe: Check the bezel edge for gaps, uneven height, or tool marks.
- Light test: Hold the piece under a directional light source. The play-of-color should be fully visible and unobstructed by an over-folded bezel.
- Edge smoothness: Run a fingernail around the bezel edge. Any sharp spots will catch on fabric and signal incomplete burnishing.
- Stone surface check: Inspect the opal’s crown for any new scratches or micro-chips introduced during setting.
“Avoid heat and excessive pressure during setting; practice on inexpensive opals or glass first; and always disclose glue if it was used for security.”
If a minor slip has left a small scratch on the stone’s surface, a professional opal re-polish may restore it. For chips at the girdle, honest disclosure to the client is essential. Avoid heat and pressure throughout the entire process, as thermal shock is one of the leading causes of post-setting crazing. For presentation ideas that showcase your finished work, the guide on displaying opal jewelry offers practical and visually compelling approaches.
Take your opal setting skills further with Australian Opal Direct
Mastering the bezel set is a milestone, but the journey into opal jewelry craft runs much deeper. Whether you are sourcing stones for a new commission or refining your design vocabulary, having access to exceptional material and trusted knowledge makes all the difference.
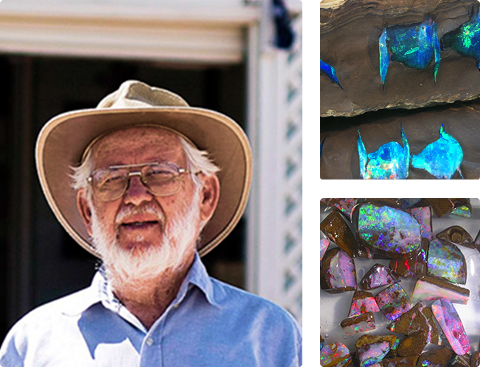
Australian Opal Direct offers a curated collection of ethically sourced, earth-mined Australian opals from Lightning Ridge, Coober Pedy, and Queensland, stones selected for their play-of-color, structural integrity, and suitability for fine gold settings. Each piece comes with direct-miner provenance, so you know exactly what you are working with before you pick up a pusher. Explore the full range of design resources, including the guide to design your opal jewelry, to deepen your craft and bring your most ambitious commissions to life.
Frequently asked questions
Why is bezel setting recommended over prong setting for opals?
Bezel setting evenly distributes pressure around the full circumference of the stone, protecting the opal’s edges and minimizing the risk of conchoidal fracture that prongs can cause.
What gold alloy is best for setting opals?
18k gold is preferred because its relative softness allows the bezel wall to be moved with gentle, controlled pressure, reducing the force needed and the risk of chipping the stone.
Can I set an opal with glue for security?
Glue can be used as a secondary security measure, but it should always be disclosed to the buyer and treated as a last resort rather than a substitute for a well-fitted mechanical setting.
How can I avoid chipping opals during the setting process?
Use a peeling motion with brass or wood pushers rather than direct downward force, and practice the technique on inexpensive glass cabochons before working on a valuable stone.
Recommended
- Master the Opal Jewelry Design Process Step by Step - Australian Opal Direct
- How to Craft Opal Rings: Create Luxury Gemstone Jewelry - Australian Opal Direct
- How to Commission Opal Jewelry: A Step-by-Step Guide - Australian Opal Direct
- How to Design Custom Opal Jewelry for Unique Creations - Australian Opal Direct
- Fine Jewelry Making Process – Malibu Vibes Jewelry