Mounting Opals Workflow: A Step-by-Step Jeweler's Guide
Posted by AOD on 16th Jun 2026
Mounting Opals Workflow: A Step-by-Step Jeweler’s Guide
TL;DR:
- A precise opal mounting workflow is essential to protect the stone’s colors and secure it in metal.
- Using the correct tools, understanding environmental controls, and choosing bezel settings improve durability and safety.
A mounting opals workflow is a precise, ordered sequence of preparation, measurement, setting, and environmental care that protects an opal’s kaleidoscopic play-of-color while securing it permanently in metal. Opals are among the most visually arresting gemstones on earth, yet their relative softness and water content make them uniquely vulnerable to damage during setting. The right workflow for opal mounting is not optional. It is the difference between a stone that glows for generations and one that crazes, chips, or loosens within months. This guide walks jewelry makers, designers, and hobbyists through every stage of the process, from tool selection to post-mounting inspection.
What essential tools and materials are needed for opal mounting?
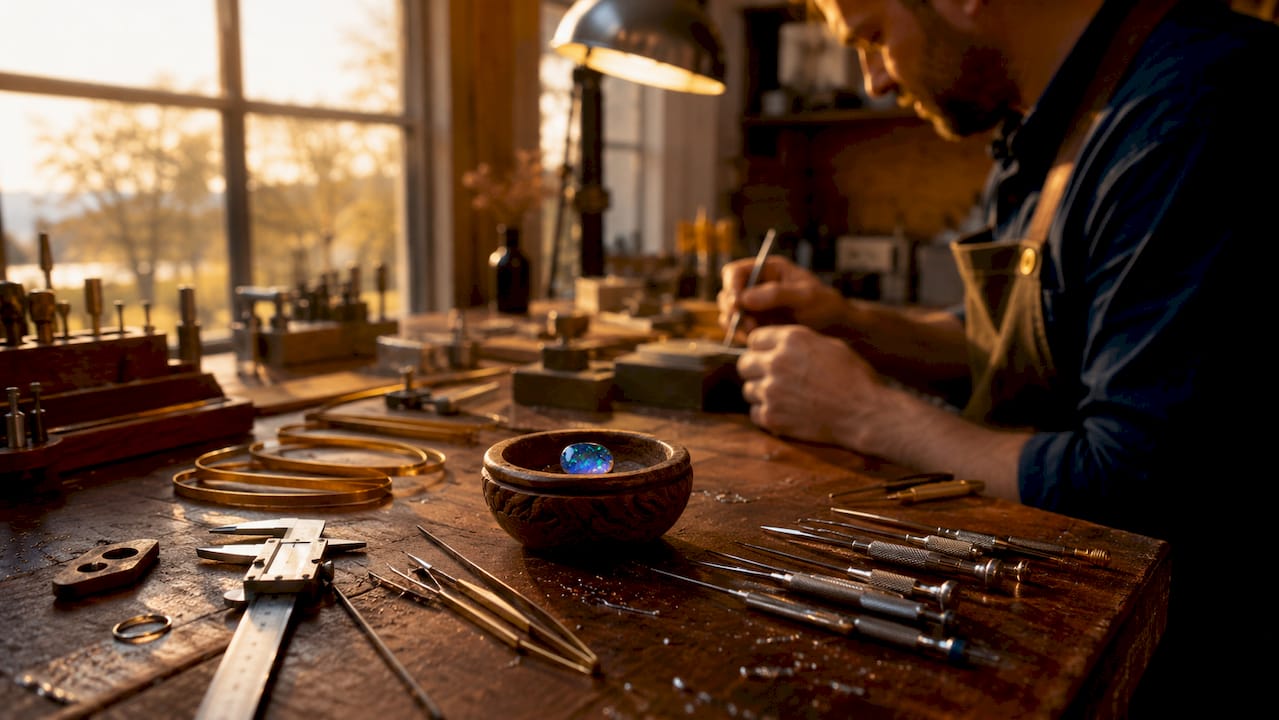
Every successful opal setting technique begins with the right toolkit. Improvising with ill-fitting tools is the fastest route to a cracked stone or a loose setting.
Measuring and fitting tools
Calipers measure stone dimensions accurately and allow you to design bezels with real tolerances rather than guessed nominal sizes. This single step eliminates most fitting problems before they start. A bezel mandrel and ring mandrel help you shape metal to exact curves. A burnisher and a bezel rocker distribute pressure evenly when closing the bezel wall over the stone.
Setting and soldering supplies
Bezel strip in fine silver or 14k gold is the primary material for constructing protective settings. You will also need solder paste with built-in flux, a torch, and a soldering block. Precision metal cutters produce clean joints that close without gaps. For opal doublets and triplets, Epoxy 330 is the recommended adhesive. It cures in approximately two hours and bonds delicate composite stones without optical distortion.
Environmental controls
The workspace environment is part of the toolkit. Maintain indoor humidity between 40–60% throughout the mounting process. Sudden temperature swings cause thermal shock, which can introduce micro-cracks into the stone before you have even finished setting it. Keep a small hygrometer on your bench to monitor conditions in real time.
The table below summarizes the core materials and their roles:
| Tool or Material | Purpose |
|---|---|
| Calipers | Measure opal and bezel dimensions with accuracy |
| Bezel strip (fine silver or 14k gold) | Construct the protective metal wall around the stone |
| Solder paste with flux | Join bezel components cleanly and securely |
| Epoxy 330 | Bond doublets and triplets with strong, clear adhesion |
| Bezel rocker or burnisher | Close bezel wall evenly without direct stone contact |
| Hygrometer | Monitor workspace humidity to prevent thermal shock |
Avoid ultrasonic cleaners, steam cleaners, and any mechanical vibration tools near opals at every stage. Ultrasonic and steam cleaning cause thermal shock that leads directly to crazing or cracking.
How do you mount opals securely using bezel settings?
The bezel setting is the gold standard for opal setting techniques. It wraps a continuous metal wall around the stone’s girdle, shielding the edges that absorb the most impact during wear. Bezel settings in 14k gold or platinum offer the best physical protection for opals worn daily. Prong settings and tension mounts expose too much of the stone’s edge and should not be used with opals.
Step-by-step bezel setting process
-
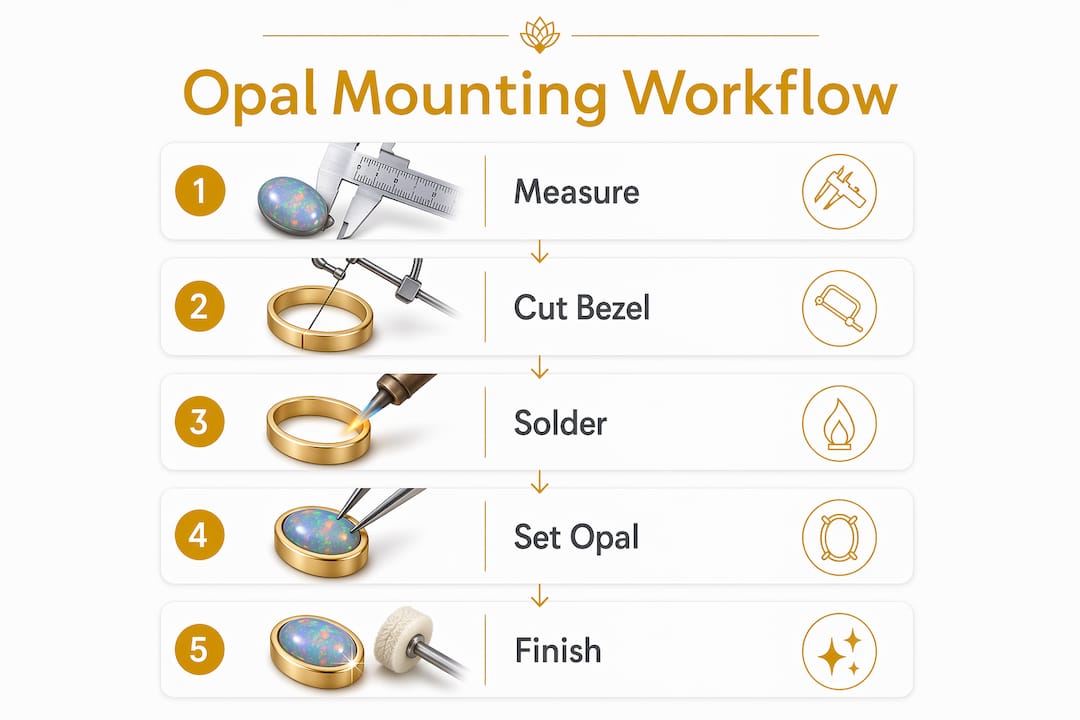
Measure the opal precisely. Use calipers to record length, width, and height at multiple points. Free-form opals require measurements at the widest and narrowest spans. Design your bezel to match the actual stone, not a standard size.
-
Cut and form the bezel strip. Cut the strip to the correct circumference. Bend it around a mandrel until the ends meet cleanly. The joint should be gap-free before soldering.
-
Solder the bezel joint. Apply solder paste to the joint and heat evenly with a torch. A clean, well-fluxed joint produces a seam that is invisible after polishing. Use calibrated metal cutters and precision flux to keep the joint tight.
-
Attach the bezel to the base. Solder the finished bezel ring to the jewelry base. Check for gaps underneath the bezel wall. Any gap weakens the setting and allows the stone to rock.
-
Seat the opal. Place the opal gently into the bezel. For doublets or triplets, apply Epoxy 330 to the base before seating. Allow the adhesive to cure fully before proceeding.
-
Close the bezel wall. Use a bezel rocker or burnisher to push the metal wall over the stone’s girdle. Work in opposing points: north, south, east, west, then fill the quarters. This distributes pressure evenly and prevents warping.
-
Polish and inspect. Polish the setting with a soft cloth or felt wheel. Inspect the bezel wall for gaps, the stone for markings, and the overall seat for security.
Pro Tip: Bezel wall thickness should be slightly greater at corners and tips, approximately 0.2 mm more than along the sides, to resist stress and deformation during the closing process.
The comparison below shows why bezel settings outperform alternatives for opals:
| Setting type | Edge protection | Recommended for opals |
|---|---|---|
| Full bezel | High | Yes |
| Half bezel | Moderate | With caution |
| Prong setting | Low | No |
| Tension mount | Very low | No |
Closed-bezel bases are preferable for cabochon opals because they provide flat surfaces for epoxy adhesion and full protection underneath the stone. Cabochons reflect light from their surface, so a closed base carries no optical penalty.
How do environmental conditions affect the opal mounting process?
Opal is not just a gemstone. It is a living record of ancient water, composed of hydrated silica spheres that can lose or absorb moisture in response to their surroundings. Opal hardness ranges from 5.5 to 6.5 on the Mohs scale, which is softer than quartz and far softer than sapphire or diamond. That softness, combined with water content, makes environmental management a non-negotiable part of any opal jewelry making process.
Crazing results from rapid or uneven water loss and thermal shock. The micro-cracks that appear on a crazed opal are irreversible. Maintaining 40–60% indoor humidity and avoiding sudden temperature changes prevents this damage. That means no mounting near open windows in winter, no storing stones near heating vents, and no leaving opals in a car on a hot day.
Key environmental best practices during and after mounting:
- Store unmounted opals in a sealed container with a small damp cloth nearby, not submerged in water.
- Keep the workspace temperature stable. Avoid moving stones between cold storage and a warm bench rapidly.
- Limit exposure to harsh chemicals, including acetone, bleach, and ammonia-based cleaners, at every stage.
- Never apply direct torch heat to a seated opal. Protect the stone with a heat sink or wet cloth if soldering near a finished setting.
- Schedule professional inspection post-mounting. Regular professional inspection detects setting loosening or microfractures before they become irreversible.
“An opal’s beauty is inseparable from its fragility. The workflow that protects it during mounting is the same discipline that preserves it for decades of wear.”
Pro Tip: After mounting, clean opals only with a soft, damp cloth. Avoid soaking, ultrasonic baths, and any abrasive polish. Learn more about preserving opal gemstones with a five-step care routine.
What are common mistakes in the opal mounting workflow?
Most opal mounting failures trace back to a small set of repeatable errors. Recognizing them before they happen is the most efficient form of quality control.
- Direct tool contact with the stone. Avoid touching the opal with the bezel pusher or rocker. Even light direct pressure leaves visible marks on a stone this soft. Always push the metal, not the gem.
- Undersized or oversized bezels. A bezel that is too tight cracks the stone during closing. One that is too loose allows the opal to shift and eventually fall out. Measure twice, cut once.
- Skipping epoxy cure time. Epoxy 330 requires approximately two hours to cure. Setting the stone before full cure weakens the bond and risks displacement.
- Using prong or tension settings. These designs concentrate stress on the opal’s edges, which are its most vulnerable points. Durability takes precedence over aesthetics for opal mounts because the stone’s edges bear the most wear stress.
- Applying direct torch heat near a seated stone. Even brief exposure to high heat causes thermal shock. If additional soldering is needed after the stone is seated, use a heat-protective paste or remove the stone first.
- Skipping post-mounting inspection. Micro-cracks and loose settings are easiest to address immediately after mounting. Waiting until a stone falls out is far more costly than a five-minute inspection.
“The most common opal mounting mistake is not a technical error. It is impatience. Rushing the bezel close or skipping the cure time undoes hours of careful work in seconds.”
For a deeper look at the full opal jewelry design process, including design planning before you ever pick up a tool, the workflow context matters as much as the individual steps.
Key Takeaways
A successful mounting opals workflow depends on precise measurement, protective bezel settings, correct adhesive selection, and consistent environmental management throughout every stage.
| Point | Details |
|---|---|
| Measure before you cut | Use calipers to record actual opal dimensions and design bezels to real tolerances. |
| Choose bezel over prongs | Full bezel settings in 14k gold or platinum provide the best edge protection for opals. |
| Control the environment | Maintain 40–60% humidity and stable temperatures to prevent crazing before and after mounting. |
| Use Epoxy 330 for composites | Allow the full two-hour cure time before seating or closing the bezel on doublets and triplets. |
| Inspect after mounting | Regular professional inspection catches loose settings and microfractures before they become permanent damage. |
What I have learned from years of working with opals
Working with opals teaches you something that no other gemstone does: the stone is always in conversation with its environment. I have seen beautifully mounted pieces develop crazing within weeks because the maker skipped humidity management. I have also seen modest, carefully executed bezel settings outlast far more elaborate designs by decades.
The single most underrated step in the entire workflow is the initial measurement. Jewelers who rush past calipers and eyeball the fit almost always regret it. A bezel that is even slightly too tight will crack a stone during closing. There is no recovering from that.
My honest advice for hobbyists is to practice the bezel close on glass cabochons of similar dimensions before touching an opal. The muscle memory you build on inexpensive practice stones is worth more than any written instruction. When you do move to an opal, especially a Lightning Ridge black opal or a Coober Pedy crystal, you will feel the difference in your hands.
Durability and aesthetics are not opposites in opal jewelry. A well-executed full bezel in 14k gold is both the safest and, in my view, the most elegant way to present these stones. The metal frame becomes part of the composition, not a compromise. For anyone serious about the craft, the step-by-step guide to setting opals in gold is worth studying before your first attempt.
— Renee
Discover premium Australian opals for your next project
Australianopaldirect sources its opals directly from miners in Lightning Ridge, Coober Pedy, and Queensland, which means every stone arrives with verified provenance and no middleman markup. Whether you are building a bezel-set ring, a pendant, or a custom commission, the quality of the raw stone shapes every outcome in your workflow.

Australianopaldirect also publishes detailed guides on opal care, setting techniques, and jewelry design for makers at every skill level. If you are ready to work with stones that reward careful technique, explore the full collection and find the opal that deserves your best work. Visit Australianopaldirect to browse ethically sourced Australian opals and find the right stone for your next setting project.
FAQ
What is the best setting type for mounting opals?
The full bezel setting is the best choice for opals. It shields the stone’s edges, which are the most vulnerable points, and works well in 14k gold or platinum for daily-wear pieces.
How do I prevent crazing when mounting opals?
Maintain workspace humidity between 40–60% and avoid sudden temperature changes. Crazing results from rapid or uneven water loss, so gradual, stable environmental conditions are the primary defense.
Can I use epoxy to mount opal doublets and triplets?
Yes. Epoxy 330 is the recommended adhesive for opal doublets and triplets. It cures in approximately two hours and provides strong, clear bonding suitable for composite opal stones.
Why should I avoid prong settings for opals?
Prong settings concentrate stress on the opal’s edges and leave large areas of the stone exposed to impact. Opals rate 5.5–6.5 on the Mohs scale, making them too soft for the mechanical stress prongs create.
How often should mounted opals be inspected?
Professional inspection once a year is the standard recommendation. Regular checks detect prong wear, setting loosening, or microfractures early, before they cause irreversible damage to the stone.
Recommended
- Master the Opal Jewelry Design Process Step by Step - Australian Opal Direct
- How to Commission Opal Jewelry: A Step-by-Step Guide - Australian Opal Direct
- How to set opals in gold: step-by-step artisan guide - Australian Opal Direct
- Custom Opal Jewelry Workflow: Create Bespoke Designs Easily - Australian Opal Direct