Avoid Overpaying for Loose Opals: N1–N9 and a 5 Point Buyer Checklist
Posted by AOD on 19th Sep 2026
Avoid Overpaying for Loose Opals: N1–N9 and a 5 Point Buyer Checklist
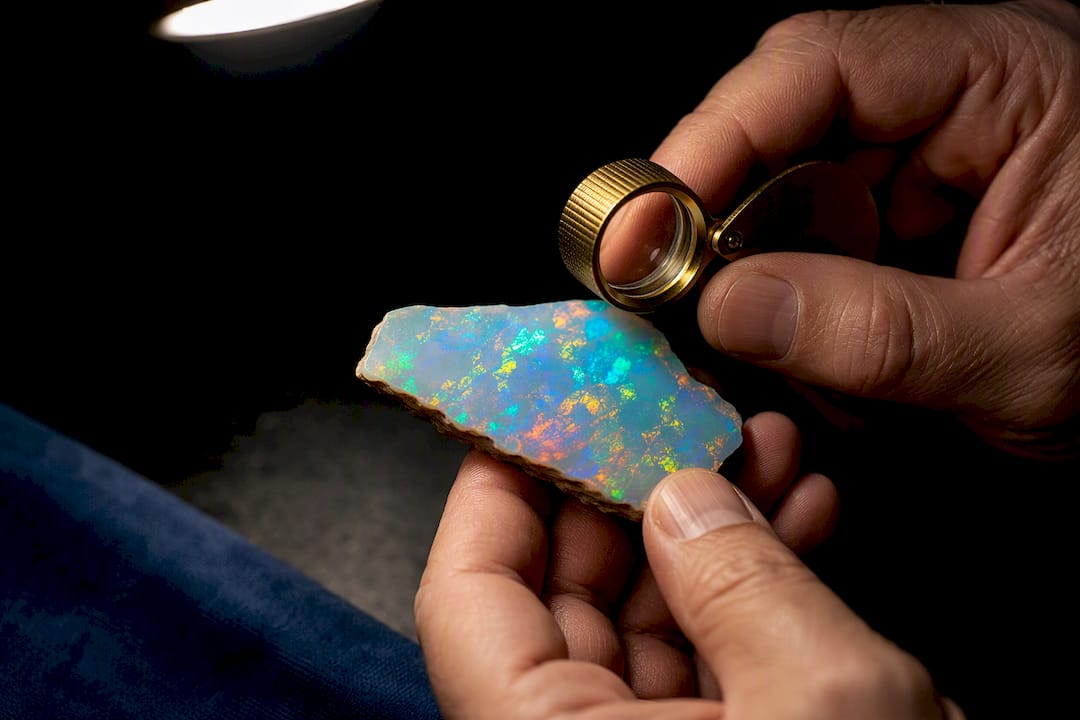
Loose opal grading comes down to five factors, and two of them decide most of the price: body tone on the N1–N9 scale and the brightness of the play-of-color. Coverage, pattern, and transparency shape the rest. Before you spend a dollar, insist on the opal’s type, its N-number in writing, and a dry inspection under neutral light. A bright stone with an honest disclosure beats a dark, dull one every time.
TL;DR:
- Brightness often overrides body tone in value, with a dull black opal costing less than a bright crystal or fire opal of the same body tone.
- Proper grading follows a sequence: identify type, confirm N-number, evaluate brightness, coverage, pattern, and inspect for assembly or crazing before discussing treatments.
- A natural, solid opal shows continuous color around the girdle, while doublets or triplets reveal visible seam lines at the edges.
- Water absorption and crazing are key indicators of structural instability, especially in Ethiopian hydrophane opals, requiring dry inspections and stability documentation.
- Buyers should verify grading details—such as N-number, origin, and treatments—in writing and request lab reports or direct sourcing information for confidence.
Table of Contents
- What Order Do Professional Opal Graders Follow?
- Why Does the N1–N9 Body Tone Scale Matter So Much?
- How Do You Judge Play-of-Color and Pattern Quality?
- What Do Transparency and Structural Stability Tell You?
- Does Cut and Size Actually Change an Opal’s Value?
- How Do You Spot a Doublet, Triplet, or Treated Opal?
- How Should You Physically Inspect a Loose Opal?
- Why Provenance and Miner Relationships Matter
- Are You Buying for Investment, Jewelry, or Display?
- Where to Find Graded Loose Opals With Real Documentation
- Where Can You Verify These Grading Standards Yourself?
- FAQ
What Order Do Professional Opal Graders Follow?
Graders do not evaluate opal randomly. They move through a sequence, and the order matters because each factor sets the context for the next one. Skip a step, and you risk comparing stones that were never comparable to begin with.
The typical sequence runs like this: identify the opal type and its body tone first, then judge brightness, then coverage, then pattern, then transparency and clarity, then cut and size, and only at the end does anyone discuss treatments or assembly. Professional evaluation protocol treats color, pattern, and clarity as the three pillars of judgment, and it insists on controlled lighting against a dark background before any conclusion gets made. Skip that lighting step and you’ll misjudge brightness on nearly every stone you look at.
Here’s the part that surprises new buyers: body tone tells you which family a stone belongs to, but brightness usually decides where it lands in price. A dull black opal often sells for less than a brilliant crystal opal, even though “black” carries more prestige on paper. Trade practice treats body tone as the sorting mechanism and brightness as the price lever, and that distinction alone will save you from overpaying for a name.
A quick five-point check works for both in-person inspection and photo review:
- Type first. Confirm whether you’re looking at black, dark, light, crystal, boulder, fire, hydrophane, or common opal, since expectations shift completely by family.
- Body tone in writing. Ask for the N-number, not a vague label like “semi-black.”
- Brightness under neutral light. Judge play-of-color against a dark background in soft daylight, never under warm indoor bulbs.
- Coverage estimate. Look for dead, colorless patches that eat into the face-up area.
- Side profile check. Tilt the stone to its edge to rule out a glued assembly before you go any further.
Run through those five points before you look at price. Everything after this section explains how to execute each one with precision.
Why Does the N1–N9 Body Tone Scale Matter So Much?
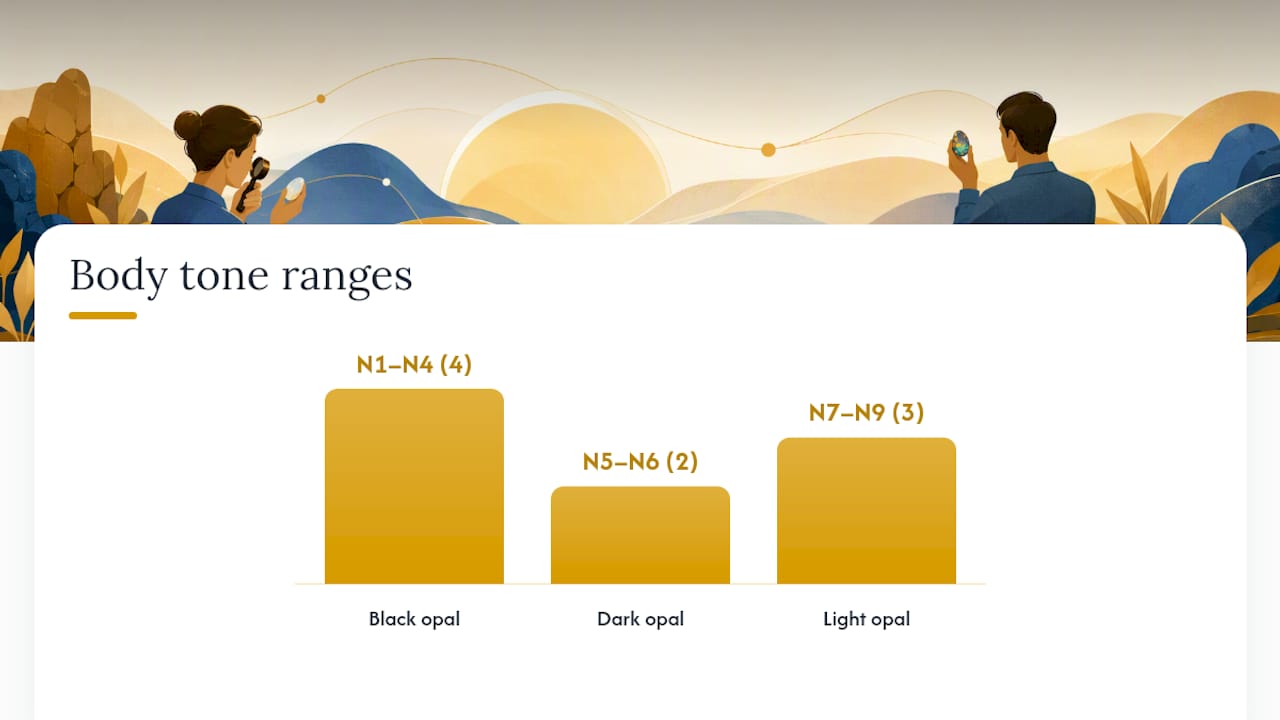
The N1–N9 scale, developed within the Gemmological Association of Australia’s nomenclature, measures how dark or light an opal’s background appears. N1 through N4 fall into the black opal category, N5 and N6 are classed as dark opal, and N7 through N9 are light opal. That range single-handedly separates the three broadest opal families, and it does so with more precision than any marketing label ever could.
Before the N-number means anything, though, you need to know what kind of opal you’re holding. Opal comes in several recognized families, and each one carries different baseline expectations:
- Black opal: dark to near-black body tone, prized for making play-of-color appear intensely saturated.
- Dark opal: a mid-range body tone, still capable of dramatic color but slightly lighter than true black.
- Light opal: a pale to white background, common from many Australian fields, where brightness has to work harder to stand out.
- Crystal opal: transparent to semi-transparent body, allowing light to pass through and often amplifying perceived brightness.
- Boulder opal: thin seams of opal attached to ironstone matrix, valued for pattern and color rather than body tone alone.
- Fire opal: typically orange to red background color, valued for hue rather than play-of-color in many specimens.
- Hydrophane opal: porous material, frequently sourced from Ethiopian deposits, that absorbs water and changes appearance temporarily.
- Common opal (potch): lacks play-of-color entirely and holds little to no gem value on its own.
Pro Tip: Ask the seller to write the N-number on the invoice or certificate, not just say it out loud. A verbal “it’s a dark opal” means nothing if a dispute arises later.
Here’s where the scale gets interesting in practice. Trade experience shows that a bright N6 stone can outsell a dull N2 stone, even though the N2 technically qualifies as true black opal. Buyers who chase the word “black” without checking brightness routinely overpay. One coherent, if informal, industry observation puts it plainly: a brilliant crystal opal on a light base can outprice a lifeless black opal, because brightness levels the playing field across body tones. Learn the N1–N9 body tone scale in detail before you compare two stones side by side, because the number alone won’t tell you which one actually looks better in your hand.
How Do You Judge Play-of-Color and Pattern Quality?
Brightness is typically judged qualitatively from subdued to brilliant, based on the visibility and intensity of the play-of-color under suitable light.
Judge brightness under soft, indirect daylight, never under a jeweler’s spotlight or a phone flashlight, both of which flatter weak stones and distort true intensity.
Pattern carries its own premium structure, and the vocabulary matters because it directly affects price:
- Harlequin. Broad, angular patches of color in a mosaic arrangement, among the rarest and most valuable patterns found in opal.
- Broad flash. Large, sweeping bands of color that shift as the stone moves, commanding strong premiums when the flash covers most of the face.
- Rolling flash. Color that moves in waves across the stone as you tilt it, prized for its sense of motion.
- Pinfire. Small, dense points of color scattered evenly, common and attractive but generally valued below the broader patterns above.
Coverage describes how much of the visible surface produces play-of-color, assessed by visually estimating areas lacking color flashes. A stone with 90 percent coverage and one small dead spot near the edge still reads as strong; a stone with color concentrated in a single corner and colorless everywhere else will disappoint once it’s set in a ring, where that corner might end up hidden by a prong.
Viewing range separates good stones from great ones. Tilt the opal through several angles, front to back and side to side, watching for color that holds steady versus color that vanishes the moment you move past a narrow window. A stone that only shows fire from one precise angle will frustrate you every time you glance down at your hand.
A short checklist for this stage:
- View the stone face-up under neutral daylight against a dark background.
- Tilt it slowly through at least four angles to test viewing range.
- Identify the dominant pattern and note whether it’s consistent or patchy.
- Estimate coverage as a rough percentage, flagging any dead zones.
- Compare brightness to a known reference stone if one is available.
What Do Transparency and Structural Stability Tell You?
Opal’s transparency varies and is assessed relative to its type, ranging from transparent to opaque, with specific expectations for each opal family.
Hydrophane opal deserves its own caution. This porous material, often associated with Ethiopian deposits, absorbs water and can change appearance, sometimes dramatically, when wet. A hydrophane stone that looked vivid at the point of sale can turn cloudy or even crack if it absorbs moisture and dries out unevenly later. Trade sources are direct on this point: insist on dry inspection, and ask for documentation of stability if the seller can provide it.
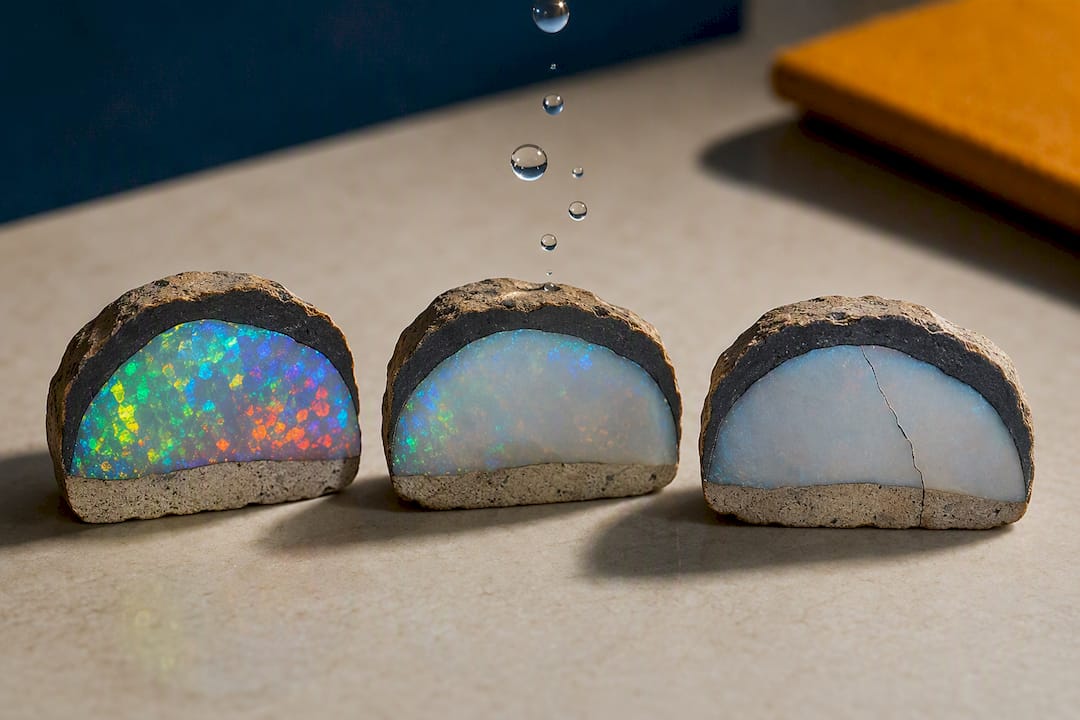
Crazing is the structural flaw every buyer needs to learn to spot. It shows up as a fine network of surface cracks, sometimes invisible until the stone catches angled light just right. Crazing signals internal stress and structural instability, and once it starts, it tends to spread. Check for it by inspecting the stone dry, rotating it under a raking light source, and comparing it against any earlier photos if you’re buying from a listing rather than in person.
A short list of other clarity concerns worth asking about directly:
- Pits. Small surface indentations from the polishing process or natural porosity.
- Matrix inclusions. Visible ironstone or host rock breaking through the opal layer, common in boulder opal but unexpected elsewhere.
- Fractures. Internal or surface breaks that go beyond simple crazing and threaten the stone’s integrity.
One consistent piece of trade guidance holds regardless of type: hydrophane opals require dry inspection and, ideally, a stability statement from the seller before purchase, because appearance and even mass shift with water content. Ask plainly how long the stone has been out of the ground and whether it has ever been soaked or oiled.
Does Cut and Size Actually Change an Opal’s Value?
Face-up spread, measured in millimeters, usually predicts perceived value more reliably than carat weight. Opal’s specific gravity varies by type, so two stones of identical carat weight can look wildly different in size once you set them side by side. A collector comparing stones by weight alone is comparing the wrong number.
Dome height matters for both appearance and durability. A well-proportioned cabochon shows a gentle, even curve that lets light play across the surface without creating harsh glare at the edges. Too flat, and the stone loses depth; too domed, and it becomes fragile at the edges and awkward to set.
Symmetry and polish quality reveal how much care went into the cutting process. Run a finger gently across the surface. Uneven edges, visible tool marks, or an off-center dome all suggest a rushed cut, and a rushed cut on a fine rough piece of opal is a genuine waste of good material.
A few rules of thumb worth carrying into any purchase:
- Compare face-up millimeters, not carats, when judging two stones against each other.
- Consider the setting first. A ring stone needs enough thickness to survive daily wear; a pendant stone has more flexibility.
- Watch for “big but sleepy” stones. A large, low-brightness opal often carries a lower per-carat value than a smaller, brilliant one, because size alone doesn’t sell an opal once the buyer actually looks at it.
- Freeform versus calibrated cuts each have a place: freeform preserves more rough material and often more brightness, while calibrated cuts fit standard jewelry settings more easily.
Boulder and matrix opal follow different pricing logic entirely, since the ironstone backing is part of the stone’s identity rather than a flaw to discount.
How Do You Spot a Doublet, Triplet, or Treated Opal?
Assembled stones are not automatically bad purchases, but an undisclosed one is always a problem. A doublet pairs a thin slice of natural opal with a backing material, usually ironstone or black glass. A triplet adds a clear cap, usually quartz or glass, on top of that same pairing. Both can look stunning and both cost a fraction of a solid stone, which is exactly why disclosure matters so much.
The tell is almost always at the girdle, the narrow edge where the stone meets its setting. Solid opal shows continuous color and material all the way around that edge. A doublet or triplet shows a visible seam line, a place where two distinct materials meet in a flat, straight boundary that natural opal never produces on its own.
Here’s a step-by-step way to check any loose stone before you buy:
- Hold the stone at eye level and rotate it slowly, watching the girdle the entire time.
- Look for a flat seam line running horizontally around the edge, a strong sign of assembly.
- Check for a glassy, overly perfect dome on top, which usually indicates a triplet’s protective cap.
- Compare the color intensity of the top surface to the sides; a dramatic drop-off suggests a thin veneer over backing material rather than solid material throughout.
- Ask directly: solid, doublet, or triplet, in writing.
Treatments extend beyond assembly. Dyeing can darken a light stone to mimic black opal’s premium look. Sugar or smoke treatments, more common on porous opal types, artificially deepen body tone through a chemical process. Impregnation with oil or resin can temporarily improve apparent clarity while masking crazing that will likely resurface.
Pro Tip: Request a written statement listing the stone as “natural, solid, untreated” or specifying exactly which treatment was applied. Vague language like “enhanced” or “stabilized” without detail is a signal to ask more questions, not fewer.
A reliable seller will disclose all of this before you ask twice. Reviewing an opal authentication guide before a purchase gives you the exact language to request in any sales conversation.
How Should You Physically Inspect a Loose Opal?
Set up the right conditions before you touch the stone. Use soft, indirect daylight, ideally near a window but out of direct sun, against a dark, neutral background like black velvet or a gray card. Warm indoor lighting or a phone flashlight will distort both brightness and body tone.
A small kit makes the process repeatable every time:
- 10x loupe for surface inspection
- Millimeter gauge for face-up spread measurements
- Small gem scale for weight verification
- Neutral gray card as a lighting reference
- Soft gloves or tweezers to avoid oil transfer from your hands
- A long-arm lamp positioned to the side for profile and seam checks
With the setup ready, work through this routine on every stone:
- Identify the opal type based on body, transparency, and visual characteristics.
- Perform a dry test, confirming the stone hasn’t been recently wetted or oiled.
- Request and verify the N-number body tone rating in writing.
- Assess brightness, pattern, and coverage under your controlled lighting.
- Check the side profile at the girdle for any sign of a doublet or triplet seam.
- Photograph the stone from four angles for your own documentation record.
- Confirm measurements with the mm gauge and weight with the scale.
| Step | Tool needed | What you’re confirming |
|---|---|---|
| Type identification | Loupe, neutral light | Which opal family sets your expectations |
| Dry test | None (visual/tactile) | Stone is not wet, oiled, or freshly treated |
| N-number verification | Written seller statement | Body tone matches the claimed family |
| Brightness and pattern check | Dark background, daylight | Play-of-color quality and pattern type |
| Profile inspection | Loupe, side lamp | Solid versus doublet/triplet construction |
What to ask a seller in writing before you pay: the N-number, whether the stone is solid or assembled, any treatments applied, and whether a lab identification report exists. A GIA colored-stone identification report documents weight, measurements, origin, and detectable treatments, but it will not assign the stone a numeric grade the way a diamond report does. That distinction trips up a lot of first-time buyers who assume a lab report functions like a diamond certificate. A printable opal quality checklist covers each of these steps in a format you can bring to an in-person viewing.
Why Provenance and Miner Relationships Matter
Grading knowledge only protects you as far as the seller’s honesty extends. That’s where sourcing history becomes part of the evaluation, not a separate concern from it.
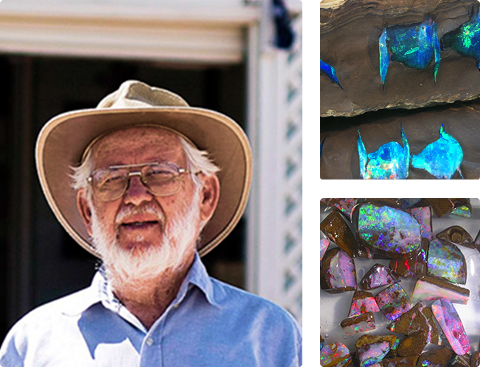
Renee, who oversees opal sourcing and grading standards at a retailer, works directly with buying decisions that connect grading theory to actual stones moving through the business. That hands-on exposure to rough and cut opal from Lightning Ridge, Coober Pedy, and Queensland shapes how the brand talks buyers through N-numbers, brightness, and disclosure in practice, not just on paper.
A few brand-level signals worth knowing before you buy from any retailer include:
- Direct relationships with miners can reduce layers of markup and the chance of murky provenance.
- Ethical sourcing policies are important in opal, given how fragmented small-scale mining can be.
- Written guides and checklists signal a seller willing to educate rather than just sell.
- Buyer protections such as shipping, insurance, and warranty reduce risk if a stone doesn’t match its written disclosure.
Are You Buying for Investment, Jewelry, or Display?
Your priorities should shift depending on why you’re buying. A collector chasing rarity should weight pattern, color range, and long-term stability above everything else, because a harlequin-patterned black opal with excellent structural integrity will hold its value across decades in a way a common pinfire stone never will.
A jewelry buyer has a different equation. Wearability and durability matter more than rarity, and a well-proportioned, stable stone with strong brightness will outperform a large, dramatic piece that chips at the first knock against a countertop. If you’re choosing between a large N3 stone with subdued color and a smaller N6 stone that’s brilliant and evenly domed, take the smaller stone for a ring. It will read better on the hand and survive daily wear far more reliably.
Display pieces sit somewhere in between. Size and pattern drama matter more here than day-to-day durability, since the stone won’t face the wear a ring or bracelet endures.
— Renee
Where to Find Graded Loose Opals With Real Documentation
Some retailers offer direct-to-buyer alternatives to guessing your way through a marketplace listing. Stones in their collections may come with documented body tones as N-numbers, disclosed origins from Australian fields like Lightning Ridge, Coober Pedy, or Queensland, and notes on whether stones are solid, helping buyers obtain important details upfront.
Buyers who want an extra layer of confidence can request additional photos, a dry-inspection video, or supporting lab documentation before committing to a purchase, and the team offers private consultations for anyone weighing a significant piece against their collection goals. That kind of direct access, without a showroom markup or a chain of resellers between you and the miner, is the practical payoff of the direct-miner relationships the brand builds its sourcing around.
If you’ve worked through the checklist above and you’re ready to see graded stones in person, browse the current loose opal and custom jewelry collection or reach out to the team directly to arrange a private appraisal on a specific piece you’re considering.
Where Can You Verify These Grading Standards Yourself?
The N1–N9 body tone framework referenced throughout this guide comes from the Gemmological Association of Australia’s nomenclature, and trade associations publish classification documents defining terms like hydrophane, potch, boulder, and crazing in more technical detail than any single article can cover.
For lab documentation, GIA offers colored-stone identification reports and public buyer’s guides explaining what those reports do and don’t cover.
- GAA body tone nomenclature and opal classification standards
- GIA colored-stone identification reports and public opal buyer’s guides
- Australian opal association terminology documents (hydrophane, potch, boulder, crazing)
One clarification worth repeating on its own: a GIA identification report confirms natural origin, measurements, and detectable treatments. It does not function as a market grade the way a diamond certificate does, so treat it as a verification tool, not a price tag.
FAQ
What Are the Grades of Opals?
Opal doesn’t use a single universal numeric grade like diamonds do. Instead, graders classify stones by body tone using the N1–N9 scale, where N1 through N4 mark black opal, N5 through N6 mark dark opal, and N7 through N9 mark light opal, then layer brightness, pattern, and coverage on top of that classification.
What Is the Best Grade of Opal?
There’s no single “best” grade, since value depends on the combination of body tone, brightness, pattern, and coverage rather than body tone alone. A bright, evenly colored N6 dark opal can outsell a dull N2 black opal, because brightness of play-of-color usually drives price more strongly than the body tone label itself.
Who Should Not Wear Opal?
This is largely a matter of folklore rather than gemological fact. Opal’s real limitation is physical: it’s softer and more porous than many gemstones, so anyone doing heavy manual work, frequent water exposure, or high-impact activity should choose a protective setting or reserve their opal jewelry for lower-impact wear.
How Can You Tell if an Opal Is High Quality?
Check five things in order: the opal type, its N-number body tone in writing, brightness under neutral daylight against a dark background, coverage across the face without dead spots, and a clean side profile with no visible seam line at the girdle. A stone that checks out on all five is very likely a strong, honestly represented piece.